|
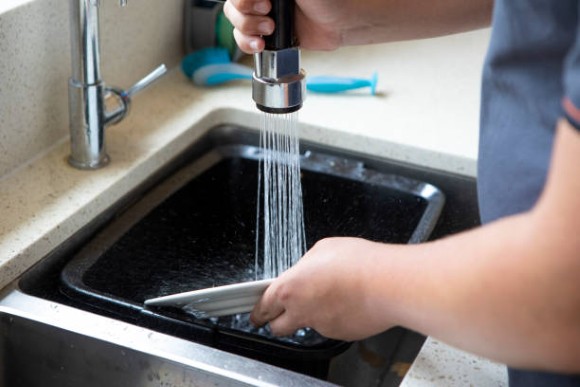
Do you wish you could install your own kitchen sink plumbing system? If so, you're not alone! Plumbing systems for kitchen sinks are definitely one of those DIY projects that many homeowners dream of doing themselves. This article will provide a detailed description of the steps involved in installing your own plumbing system for your kitchen sink. By following these steps, you'll be able to save money and avoid the hassles and headaches that come with hiring a contractor. Let's get started. The Benefits of Having a Kitchen Sink Plumbing SystemA kitchen sink plumbing system can help you save time and money. By having a dedicated line for your sink, you can avoid having to waste time cleaning up water spills and messes. You also won't need to worry about running short on supplies when it comes to washing dishes; a kitchen sink plumbing system will take care of all the necessary drainage connections. Steps Involved In Installing a Kitchen Sink Plumbing SystemPreparing Your Sink for InstallationBefore you can begin installing your kitchen sink plumbing system, you'll first need to prepare the sink itself. Make sure the area around the sink is clean and free of any obstacles that may prevent proper drainage. If necessary, remove any old paint or drywall joints before beginning installation. Installing a Drain PipeTypically, you must install a drainpipe from the street valve to the basin below the kitchen sink before installing your own plumbing system. This pipe will serve as the main line for water coursing into and out of your home's drainage system. To ensure proper flow, use a licensed plumber to install a screened drainpipe with an approved sealant. Installing the Overflow PipeThe next step is installing an overflow pipe from beneath the sink to the exterior drainage system. This pipe will help discard water and rinse dishes before it enters your home's sewer line. Make sure that all connections are tight and flush against the surrounding surface; otherwise, water accumulation may occur over time. Creating a Sink DrainThe last part of installing your own kitchen sink plumbing is installing a drain. This opening will allow water to flow directly from the basin below the sink into the sewer line. To create this hole, first, remove any existing countertop or cabinet and then cut an access hole using a Sawzall or masonry drill bit. Next, use a PVC pipe cutter to create an outlet for wastewater. Seal all openings with plumber's putty and pipe joint compound. Flushing and Testing Your New Plumbing System
Once your new plumbing system is installed and tested, it's time to flush and test it. To begin, open all taps in the kitchen sink and allow water to flow freely for 30 minutes. If everything is working properly, you'll soon see ridges on PVC pipe as wastewater flows through the system. Once testing is complete, close all faucets and return to normal household operation. SummaryInstalling a kitchen sink plumbing system is a basic task that takes some time and effort. We hope the tips we have shared above will help you finish the job successfully. As long as you follow all of the steps correctly, this will not be your first plumbing experience. If something does go wrong, hiring a licensed plumber will ensure that your sink remains operational.
2 Comments
1/4/2023 02:12:48 am
It's interesting when you said that checking the way of your sink to the drainage is important to know the proper process. The other day, my wife told me she wanted our sink replaced because of leaks and clogged pipes. She asked if I had any idea of the best option to consider. I'm grateful for the information you gave. I'll consult a trusted sink installation drainage service as they can help provide preventative measures to prevent these kinds of problems. 1/30/2023 10:11:04 pm
Thank you for mentioning that you must first prepare the sink itself before you can start installing your kitchen sink plumbing system. My sister wants a new sink for her kitchen. I'll advise her to establish a plumbing system. Leave a Reply. |